Monthly Archives: October 2014

REALLY good baked chicken meal

Hi there!

Once more I made a chicken dinner thingy. (Big surprise, right?)
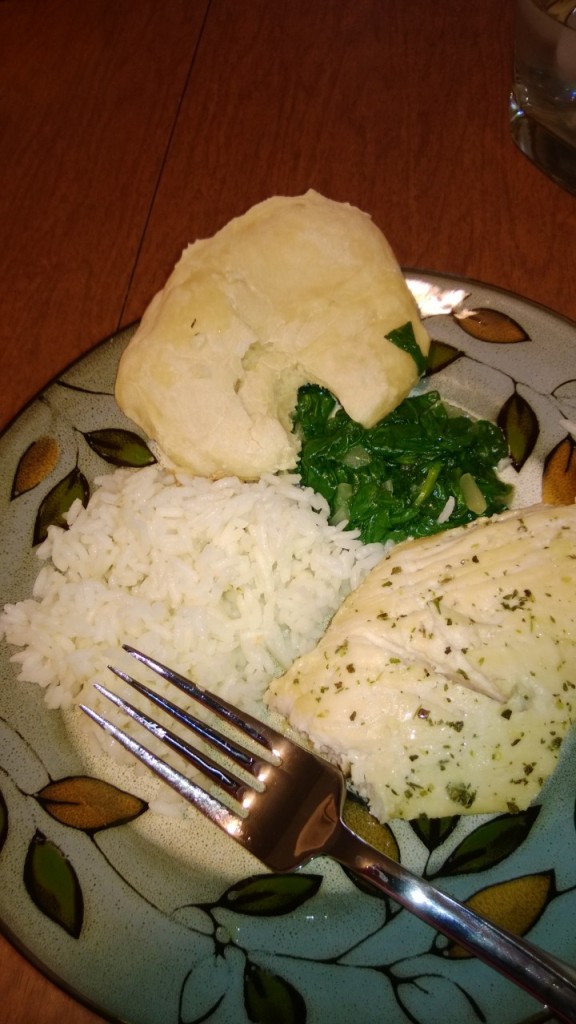
Chicken, Buttered Rice, Spinach, and Semi-Pita Bread.
Chicken, Buttered Rice, Spinach, and Semi-Pita Bread. Yum!

This one took a bit of time to prepare. As in, I marinated the chicken all day. So, plan on that, if you wish.

Other Things

Spinach

Ingredients

  1. A handful of spinach. More than you think you want, and it’ll still be less. I used probably about $0.20 worth of fresh spinach.
  2. 1 Tbsp Onion (negligible cost)
  3. About 1/2 tbsp butter (my roommate has non-stick pans that I get to use. 🙂 The butter is for flavor.) (about $0.05).

Directions

  1. Cook onions in butter until onions are tender
  2. Put the spinach in until cooked and heated.

Easy, right?

Rice

Cook according to directions. Add a bit of salt to the water, and then after it’s done, add about 1 tsp of butter. Probably about $0.25. This is a totally and completely random guess, though, and probably waaay overestimated.

Pita

I used this recipe. Use a bit less salt than it calls for, though. By probably 1/8-1/4. (I made it according to a half-recipe, and baked it in the oven.) According to my rough calculations, the pita cost about $0.15. Probably a bit less.

Chicken

Ingredients

  1. About 1/4 LB chicken, or one chicken piece like the one shown above. (About $0.55)
  2. Almost 1/2 cup milk (about $0.15)
  3. 1/2 TBSP lemon juice, plus a little extra for later (negligible cost.)
  4. 2 cloves garlic (I really don’t know… I misplaced how much the bulbs cost. Probably quite negligible, though.)
  5. 1/2 tsp Salt + a bit. (Negligible.)
  6. Parsley, Basil, Oregano (Negligible)
  7. 1/2 TBSP Oil (negligible)

Directions

In a small bowl, mix together the milk and 1/2 TBSP lemon juice. Let stand for at least 5 minutes. This makes fake buttermilk.

Then, combine the fake buttermilk with the salt, garlic, parsley, basil, and oregano. I used more parsley than basil, and more basil than oregano. Basically, until it looks seasoned…

Next put the chicken into the marinade and coat it. Sprinkle a little more salt on. (I’d heard that it helps pull the marinade/stuff in. And it seemed to work!) Let it sit in the refrigerator for the day.

If you can, you might want to turn it occasionally throughout the day and re-coat. I happened to come home early today, so it worked for me, but it shouldn’t be necessary.

When you’re ready to cook the chicken:

  1. Preheat the oven to 425 f.
  2. Transfer chicken (and about 1TBSP of the extra marinade) to a small casserole dish to cook in.
  3. Put the 1/2 TBSP oil into the pan, drizzling it over the chicken, and then into the excess marinade.
  4. Turn the chicken a couple of times to coat.
  5. Bake for about 12 minutes. Check the readiness, and (in theory) turn over the chicken. (I forgot to turn it over… I knew there was a reason I underdid the amount of time! Oh well…)
  6. Bake for about another 7 minutes. However, because of the moisture you’ve pulled into the chicken, an extra minute or two won’t hurt it. At least, it didn’t hurt mine, so yours should be good.

There you go!

Total cost of the meal: $0.70 for the chicken, $0.15 for the bread, no more than $0.25 for the rice, and about $0.25 for the spinach. Total cost: $1.35. Maximum. Not bad, right?
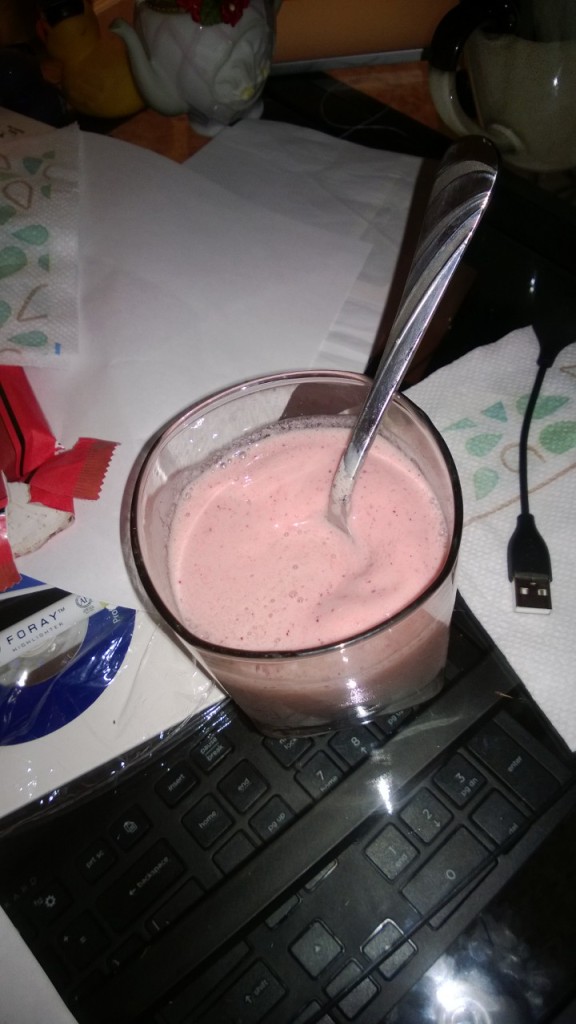
My Grape Juice Turned Into a Smoothie

Hi readers!

So. I ended up going to a highly aerobic dance club tonight. (Seriously, I completely understand how some types of dance can burn about 500 calories an hour.) (And no, it wasn’t Zumba- it was Charleston. A WHOLE lot of fun!)

And after I got back, I thought that I really wanted grape juice. After all, I’ve got some frozen grapes in the freezer and a vitamix. Shouldn’t be too hard, right?

Unfortunately, ingredients just kept on popping up their heads saying “ooh, put me in! I’d be great!”

So the end result looked like this:

A fruit smoothie that was originally supposed to be grape juice.
Uh, “Grape Juice!” Yup, sure… 😀

And it’s REALLY, REALLY GOOD. 

So, here’s the recipe for:

Not Quite Grape Juice… at all

Ingredients

  1. 3 jumbo ice cubes (minimal charge)
  2. About 4-7 frozen strawberries (No more than 1/8 of a $2.00 bag, so about $0.13. Tops. Probably close to 7-10 cents.)
  3. About 6 frozen grapes (minimal charge.)
  4. About 1/4-1/3 Cup Milk (Maybe 5 cents?)
  5. (Optional) About 1-2 TBSP half & half (Maybe 5 cents?)
  6. A splash of vanilla (minimal)
  7. 1-2 tsp honey (MAYBE $0.05?)
  8. A shake of cinnamon (minimal)

Total cost: absolutely no more than $0.30. Probably much closer to $0.10. So, basically negligible. Especially if you already have the ingredients on hand. 🙂

Directions

  1. Start off by planning on having grape juice.
  2. Turn that idea into strawberry-grape juice.
  3. Realize you have milk, and could make something icecreamish
  4. Scratch the ice cream idea, because you want a beverage
  5. Add the ice, strawberries, and grapes into the vitamix
  6. Add the milk and half & half anyways, and decide to turn it into a smoothie
  7. Realize that vanilla would go nicely
  8. Add said vanilla
  9. Go, “Ah! I can make this ‘healthy’!” and add a shake or two of cinnamon
  10. Realize that both the cinnamon and vanilla will need sweetening
  11. Put in a bit of honey
  12. Blend until smooth

Serving: About 1 Cup.

Simpler Directions

  1. Put ingredients into the vitamix
  2. Blend until smooth
  3. Enjoy
  4. Or don’t. Really, it’s up to you.

I hope you have a tasty drink/smoothie/thingy!

EXCELLENT baked biscuit-breaded chicken strips

Hi there!

Tonight I did a fair bit of pre-cooking for the week. (I took the thawed part of a couple of huge chicken breasts, and turned that into chicken strips which I then breaded and stuck in the oven.) I tried one of the strips, and I really like the way it turned out!

Biscuit-breaded Baked Chicken

I’m afraid I don’t have time to do the cost analysis, but I’m quite sure it’s a fairly inexpensive recipe. I’d guess probably no more than $1.50 a serving. It took a bit of time, since I made my own biscuits from scratch, but from what I’ve tried it’s sooo worth it. So, for any breaded chicken recipe that I do, there are generally about

three main steps

  1. Preparing the breading/coating
  2. Preparing the chicken to bake
  3. Baking the chicken.

And for this, there are three main things that get mixed together in step 2. They are

  1. breading/coating
  2. liquidy-stuff
  3. chicken

The chicken requires minimal preparation. Cut it into appropriately sized strips or chunks. Really, it’s entirely up to you. It’s in the liquidy-stuff and the breading/coating where things get fun!

Breading/Coating/Dry-Stuff

For this, I first baked some biscuits this afternoon. I pretty much used the Allrecipe Kentucky Biscuits Recipe, except that since I didn’t have buttermilk, I used a substitute.

Buttermilk Substitute

Ingredients
  1. 1 cup minus 1 TBSP milk
  2. 1 TBSP lemon juice

Mix them together, and let them stand. I found it online somewhere, and I’m afraid I’ve lost the link… I’ve been told that buttermilk is what makes biscuits flaky, and that this achieves the effect. The biscuits were flaky, so I’m guessing it worked.

Note: Even though the biscuit recipe calls for only 3/4 cup buttermilk, make the whole cup of substitute. You’ll use it later.

But back to the breading/stuff. I used a majority of my freshly baked biscuits (since they were a bit more bland than I wanted) and turned them into breadcrumbs. I’d say I probably used about 1/2-2/3 of the biscuits, and made somewhere between 1 & 2 cups of crumbs.

So, actually, here are the

Breading/Coating/Dry-Stuff Ingredients

  1. Biscuit crumbs. (1-2 cups.)
  2. salt to taste
  3. 2 cloves garlic
  4. parsley
  5. basil
  6. More parsley
  7. oregano

Basically, mix all those up. Season to taste. I’m afraid I can’t help you with the precise amount of the ingredients, since I seldom actually measure herbs… I used probably about a large pinch of each. (A very large pinch for the parsley.)

The liquidy-stuff you dip your chicken in

Ingredients

  1. 1/4 cup Buttermilk Substitute
  2. Some oil

Mix together in a bowl large enough to fit your chicken slices into.

Bread your Chicken

I think the technical term is called “dredging”, but I’m probably wrong on that, and I don’t have time to Google it.

Basically, take your chicken, dip it in your liquidy-stuff and let the excess drip off, then coat it in your biscuit crumb mixture.

If you have leftover liquid and breadcrumbs, do it again. This gives you extra thick breading.

Bake your chicken

For the size of strip that I had, I put them in the oven at 350 for 15 minutes, took them out, turned the oven up to 375, and put the chicken back in for another 10-15 minutes.

I hope you enjoy!

The Masochist’s Cookies

Hi there!

Somebody I spoke to about getting a Ph.D. once said that you can enjoy  graduate school- you just need to “embrace the masochism.”

In part in honor of that, I made what I’m terming “Masochist Cookies”, for reasons that will be apparent shortly…

These are a slight variation on chocolate chip cookies. And they are NOT for everyone, but some will really like them.

Masochist Cookies

A “Fun” Variation on Chocolate Chip

Ingredients

  • 1 1/8 Cup of Flour
  • 1 stick of butter
  • 1 egg
  • 1/2 Cup dark brown sugar
  • 1/4 Cup white sugar
  • 1/2 tsp salt
  • 1/2 tsp baking soda
  • 1 Cup Chocolate Chips

“Masochist” addendum:

  • 1 tsp – 1 Tbsp cocoa powder
  • 1/8 – 3 tsp cayenne (depending on spice preferences)
  • 1/4 – 1 tsp cinnamon

Directions

Ok. So, what I did tonight was I made the basic chocolate chip cookie dough, and then played with it…

To make the plain dough, basically just combine all the ingredients. This time I put the “dry” ingredients in first. So, flour, baking soda, salt, sugar. Mix those up nicely. I then melted the butter, and mixed that in, and then added the egg. I next added the “Masochist” part. Then I let the dough chill in the fridge for about an hour while I read another chapter in Theory of International Politics by Kenneth Waltz for a class, and then dished the cookies onto the cookie tray. (I heated the pre-oven to about 350, made really tiny cookies, and baked them for about 7 minutes. Seriously, they were miniscule. I got about 3 dozen cookies onto one sheet. So, mini chocolate-chip / butter-toffee cookie size like what you can get at the grocery store type of tiny.) If you go for normal size cookies, heat the oven to between 350 and 375, and cook them for between 9 & 11 minutes, or until you can smell them, basically.

For the “masochist addendum”. I first mixed up the basic dough.


I then pulled about half of it out, and mixed the cocoa powder in. After that, I pulled half of the chocolate dough out, and mixed the cayenne and cinnamon in. Tonight, I think I used about 1/4 tsp of cinnamon, and a bit less than 3/4 tsp cayenne. That was MUCH more cayenne than I meant to use. It turned out very noticeably, and the dough definitely deserved its title. But that’s why there’s a VERY wide range for the seasonings listed above- I made basically a quarter recipe of the masochist cookies. Increasing the yield would (in theory) require increasing the ingredients.

In order to determine how much cayenne and cinnamon to use, though, I’d seriously just sample the dough. Start with smaaaall quantities, though. Especially of the cayenne. Especially if you’re not entirely sure about the “hot chocolate” element. 🙂

So, yeah! I hope you enjoy! And have a great Saturday.